Selasa, 26 Februari 2013

Root & unRoot Smartfren Andromax-i (Alternatif)

=================================================
EASY ROOT AND UNROOT HS-EG909 Smartfren Andro Max-i
==================================================

sebenarnya cukup SIMPLE....FLASH CWM 6.0.1.5....install CWM-SuperSU-v0.96.zip
#tapi berhubung nanti banyak yang tanya caranya...anunya..itunya... saya buat detailnya. :)


#TOOLS ;
download || https://www.dropbox.com/sh/gx8xqnjj6170g2r/6GX3rMHUjx/pwned.web.id/pwned.droid/HS-EG909
1. Download semua file yang dibutuhkan dan ditaruh pada 1 folder (di PC)


#optional...kalo driver fastboot blom terinstall

2. Driver Fastbot (google-adb-driver.rar) || http://www.mediafire.com/?see40c9xaq2jg5e
#############################################
# STEP 1 (install CWM 6.0.1.5 melalui PC)
#############################################
  1. Masuk Ke FASTBOOT (Matikan max-i, tahan tombol Volume Up + tekan Tombol Power) (WELCOME TO FASTBOOT) =>> tekan tombol VOLUME UP sekali Lagi sampai ada tulisan Fastboot kecil
  2. Setelah max-i masuk menu fastboot ,connectkan usb max-i ke PC
  3. Double click file pwned.HS-EG909.CWM.v.6.0.1.5.bat (di PC)
  4. ikuti perintah yg muncul, tunggu sampai proses selesai >>> sukses >> copot pasang batere. lanjut step dibawah.
# CARA MASUK KE CWM v.6.0.1.5 for HS-EG909
1. Masuk Ke CWM (Matikan max-i, tahan tombol Volume Down + tekan Tombol Power)
note: - tombol volume up/down u/ memilih menu

- tombol home u/ OK
- tombol back u/ Back

##################################
# BACKUP @just in case kalo boot-loop ...recomended
##################################

Warning: Budayakan backup terlebih Dahulu sebelum Melakukan perubahan pada ROM, Gunakan Fasilitas Backup Pada CWM.!!

1. MASUK CWM 
2. Masuk Menu backup and restore
3. Masuk Menu choose backup format
4. Pilih tar
5. pilih backup

########################
# RESTORE @just in case kalo boot-loop
########################

1. MASUK CWM 
2. Masuk Menu backup and restore
3. Masuk Menu restore from internal sdcard
4. pilih yes-restore

#############################################
# STEP 2 install CWM-SuperSU-v0.96.zip
#############################################

0. Copy File CWM-SuperSU-v0.96.zip Ke internal storage (yang 1 GB)
1. Max-i masih dalam keadaan mati, masuk CWM
2. Masuk Menu install zip from sdcard 
3. Masuk Menu choose zip from internal sdcard 
4. pilih file CWM-SuperSU-v0.96.zip 
5. pilih reboot 
#############################################
# EASY UNROOT
#############################################

##UNROOT

1. Buka App. SUPER SU
2. pilih tab setting
3. pilih unroot
4. Reboot

##unroot manual

1. buka root explorer.. (klo blum install dulu..cari di market nyak :) )
2. masuk system/bin =>> Hapus file "su"
3. masuk system/app =>> Hapus file "superuser.apk"
4. reboot

==================================================
MAGIC ONE CLICK ROOT Smartfren Andro Max-i HS-EG909 (Windows)
==================================================


Download || fix script for win 7...update
# connect Smartfren Andro Max Ke PC ( Windows )
# Run/ Double Click pwned.HS-EG909.root.exe

Semoga Membantu,!!

Root Smartfren Andromax-U


Handheld Andromax-U ini merupakan HH keluaran dari Smartfren terbaru setelah Andromax-i. Untuk informasi mengenai Smartfren Andromax-U ini silahkan sobat kunjungi Link ini
Tutorial ini ditujukan bagi sobat yang hendak rooting pada Smartfren Andromax-U. Silahkan ikuti langkahnya berikut ini:
Penting: Lakukan instalasi ADB driver terlebih dahulu dengan cara
  1. Hubungkan kabel data Max-U ke komputer/Laptop/Mac
  2. Tunggu hingga Muncul DRIVE "cdrom_install" di Windows Explorer
  3. Buka Drive "cdrom_install"
  4. Double klik/ run setup.exe
  5. Tunggu sampai semua driver terinstall...
  6. Restart Komputer [Bila diperlukan]

Khusus pengguna Windows 7/8
  1. Jika Menggunakan Windows 7/8 siapkan koneksi internet dan colok kabel data dari andromax-U ke PC/laptop, nanti windows 7/8anda yang akan update drivernya via internet.
Langkah selanjutnya, download peralatan yang dibutuhkan DISINIsilahkan download dan jadikan dalam satu folder
# Langkah 1 (install CWM 6.0.2.7 melalui PC)
  1. Masuk Ke FASTBOOT Mode (Tahan Tombol VOLUME DOWN + tekan Tombol POWER, nanti akan ada logo Smartfren dengan background Hitam)
  2. Setelah Andromax-U masuk menu FASTBOOT, hubungkan USB Andromax-U ke PC
  3. Double click file pwned.andromax-u.innos-i6C.bat (di PC)
  4. ikuti perintah yg muncul, tunggu sampai proses selesai
  5. bila tidak reboot otomatis copot pasang batere. lanjut step dibawah.
Penting lakukan backup, jika sewaktu-waktu mengalami kegagalan dengan cara
# BACKUP  
1. MASUK CWM Mode (Tahan Tombol VOLUME UP+ tekan Tombol POWER, nanti akan ada gambar robot hijau)
  1. Masuk Menu backup and restore
  2. Masuk Menu choose backup format
  3. Pilih tar
  4. pilih backup

#RESTORE
1. MASUK CWM Mode
  1. Masuk Menu backup and restore
  2. Masuk Menu restore from internal sdcard
  3. pilih yes-restore

#Langkah 2 install UPDATE-SuperSU-v1.04.zip
  1. Copy File UPDATE-SuperSU-v1.04.zip Ke internal storage (yang 1 GB)
  2. Andromax-U masih dalam keadaan mati, masuk CWM
  3. Masuk Menu install zip from sdcard
  4. Masuk Menu choose zip from internal sdcard
  5. pilih file UPDATE-SuperSU-v1.04.zip
  6. pilih reboot

okee, setelah reboot silahkan buka aplikasi SuperSU dan selamat, sobat sudah berhasil Root Andromax-U!
Note: Smartfren Andromax-U sudah tidak bergaransi (warranty void) jika sudah di rooting. Jika sewaktu-waktu harus berkunjung ke galeri Smartfren (HH bermasalah) silahkan lakukan unroot terlebih dahulu

Senin, 25 Februari 2013

Genius Scan, Scanner Genggam Di Handphone Pintar Anda

Dengan Aplikasi Ini anda tak perlu repot-repot menggunakan scanner biasanya  yang terkadang anda merasa ribet untuk memakai scanner biasa yang ukurannya juga tak begitu kecil. Kini Scanner sudah ada di genggaman anda.
Tinggal Jepret-jepret dengan Kamera smartphone kesayangan anda data fisik sudah dalam genggaman anda dalam bentuk digital / softcopy.
Silahkan Simak & Download dimari;


But first, the key features (aka.: what makes this scanner different from the camera) 

  • Detects page frame and corrects perspective 
  • Enhances the scan with color or black-and-white post-processing 
  • Emails the scans as JPG or PDF
  • Creates PDF documents with multiple scans 
  • Export documents to any app supporting JPG or PDF files
  • Documents are processed on the phone, not sent to a third-party server
Wondering how our users use Genius Scan? 
  • To quickly scan a form you just printed when you don’t have a scanner 
  • At the university, to take a picture of a whiteboard 
  • On the road, to archive receipts and send them to Expensify 
  • To make a copy when you have no copier available 
  • To archive handwritten notes or share them with colleagues 
  • Save the perfect recipe after cooking 
  • Save handwritten memos, or book pages for future reference 
  • Share a good restaurant menu on Twitter
What's in this version : (Updated : Dec 20, 2012 )
  • Tablet support and other UI changes
  • Spanish support
  • Multiple selection of scans and documents
Required Android O/S : 2.2+

Screenshots :
 
 
Download : 6.2Mb APK

4 Aplikasi Office Terbaik Untuk Android


Pada posting kali ini kami akan membahas dan men-share 3 aplikasi Office terbaik untuk android. Dengan aplikasi office, akan membantu anda dalam mengerjakan tugas kantor, sekolah atau kuliah walau dalam situasi mobile sekalipun. Baiklah ini dia 3 aplikasi Office terbaik untuk android:
1. Quickoffice Pro
download quickoffice pro pdf apk
Quickoffice adalah pengembang yang telah diakui oleh Google sebagai “Top Developer” yang menawarkan aplikasi perkantoran atau office suite yang paling lengkap yang tersedia untuk android. Aplikasi ini mampu bekerja dengan baik pada dokumen Word, Excel spreadsheet, dan presentasi PowerPoint dan juga kemudahan dalam mengakses file dari jarak jauh dengan File Manager, seperti Google Docs, Dropbox, Box, Evernote, MobileMe dan lain-lain. Quickoffice Pro juga bisa digunakan untuk melihat file PDF, karena sudah dilengkapi dengan PDF Viewer.
Berikut ini adalah fitur dan kelebihan dari Quickoffice Pro:
  • Create, View & Edit dokumen Microsoft Word (doc & Docx)
  • Create, View & Edit Excel ® Spreadsheet (xls & Xlsx)
  • Create, View & Edit presentasi PowerPoint ® (ppt & PPTX)
  • Akses Google Docs, Dropbox, Box, Evernote, Huddle, Catch, SugarSync dan MobileMe
  • Akses mudah untuk mengatus file pada perangkat anda
  • View Office dan non-Office file dalam file manager
  • Create, Copy, Move, Delete dan me-rename file dan folder
  • Berbagi file melalui email, SMS, Bluetooth, Cloud Service dan media sosial
  • Browse file Zip dan meng-copy file dari folder zip ke direktori lain.
  • DOWNLOAD
2. Documents To Go
download documents to go full version key apk
Document To Go adalah salah satu aplikasi Office terbaik untuk android. Di Android Market,Dataviz Inc mengeluarkan dua aplikasi, yakni Documens To Go 3.0 Main App dan Documents To Go Full Version. Untuk Documents To Go 3.0 Main App hanya bisa digunakan untuk melihat file dokumen Word, Excel dan PowerPoints saja, dan jika anda ingin membuat, dan mengedit  dokumen maka anda harus menginstall Documents To Go Full Version yang tidak gratis tentunya, dan untuk menginstall Documents To Go Full version Key anda harus meng-install Documents To Go Main App terlebih dahulu.
3. Google Docs
download google docs apk
Ini dia aplikasi Office buatan Google. Dengan Google Docs anda bisa meng-edit, membuat, melihat dokumen dengan mudah. Tidak seperti dua aplikasi sebelumnya, Google Docs bisa anda download secara gratis namun tentu saja, fitur di dalamnya saat anda mengedit dokumen tidak selengkap dari dua aplikasi diatas.

4. Office Suite Professional 

Seperti dengan nama aplikasinya, diperuntukkan untuk kalangan profesional yang memiliki mobilitas tinggi, dengan harga sekitar 6.99$ anda bisa mendapatkan berbagai kelengkapan menu editing office yang lengkap. Dibandingkan aplikasi gratis di android, “Office Suite Professional” menawarkan dukungan format dokumen yang lebih lengkap, contohlah file dengan format XLSM, PPTM, PPSM, dan DOCM bisa dibukan dengannya.
Satu fitur yang cukup menarik perhatian blogbintang adalah menu pencetakan dokumen menggunakan “Google Cloud Print” dimana kita bisa mencetak dokumen langsung dari aplikasi ini, tanpa harus menyambungkan gadget Android kita dengan WiFi, USB, NFC, ataupun Bluetooth.


MEMPERCEPAT LOCK SATELIT GPS DI ANDROID

Ada beberapa hp android mengalami masalah bila menggunakan GPS untuk mengunci satelit terasa sangat lambat ataupun tidak bisa sama sekali. jelas ini sangat menganggu sekali bila saat kita perlukan di perjalanan. kali ini kami mencoba memberi alternatif lain untuk mempercepat dalam proses mengunci satelit GPS.
Pastikan handheld android kamu sudah di Root untuk menngunakan Tips cara mempercepat lock/kunci satelit GPS ini.
1.Download file ini dulu GPS_Fix.zip
2.Setelah itu extract file yang tadi kamu download (terdapat 3 file: agps_rm,gps.conf dan SuplRootCert)
3.Buka Root Explorer (kalo belum ada silahkan install dulu)
4.Setelah Root Explorer pindahkan ke 3 file tersebut ke System/etc (jgn lupa di mount R/W di Root Explorernya, tombolnya ada di pojok kanan atas)

5.Kemudian Reboot android kamu
6.Setelah Reboot instal GPSTest (cari di Google Play Gratis!)
7.Pastikan di pengaturan GPS di Android Kamu A-GPS di centang (settings >> Location services >>)
8.Jalankan GPSTEST dan Clear A-GPS yang berada di setingan GPSTEST kemudian Update A-GPS
9.Biarkan GPSTest Melakukan lock satelit dulu (kamu harus berada di luar ruangan)
10.Memang untuk pertama kali di butuhkan beberapa menit dalam mengunci satelit tapi selanjutnya hanya membutuhkan beberapa detik dalam mengunci satelit GPS.
11.Selanjutnya silahkan di coba di Aplikasi GPS kamu seperti Navitel, NDrive atau Gmaps
Semoga tips di atas bisa sukses di hp kamu, perlu di ingat ini hanya cara lain dalam mempercepat lock satelit GPS dan kami tidak menjamin bisa sukses di HP kamu.

Cara alternatif :
Cara ini terbilang mudah, gak pake ribet harus nge-root android dulu atau ubah settingan dll. Silakan coba cara ini : 
  1. Install aplikasi GPS Test : https://play.google.com/store/apps/details?id=com.chartcross.gpstest
  2. Aktifkan GPS.
  3. Pergilah ke ruang terbuka dan jalankan aplikasi GPS Test.
  4. Tunggu sampai tombol GPS status berubah menjadi hijau dan Akurasinya bagus (sekitar 2 menit).
    Screenshot Aplikasi GPS Test
    Kondisi GPS sudah siap
  5. Dengan demikian GPS sudah di lock dan kita dapat menggunakan aplikasi tracking sesuai dengan harapan.
    Run Keeper
    Sinyal GPS “Good” pada aplikasi Run Keeper
Note : Waktu yang dibutuhkan mungkin berbeda-beda setiap orang, tergantung dari smartphone dan juga lokasinya.


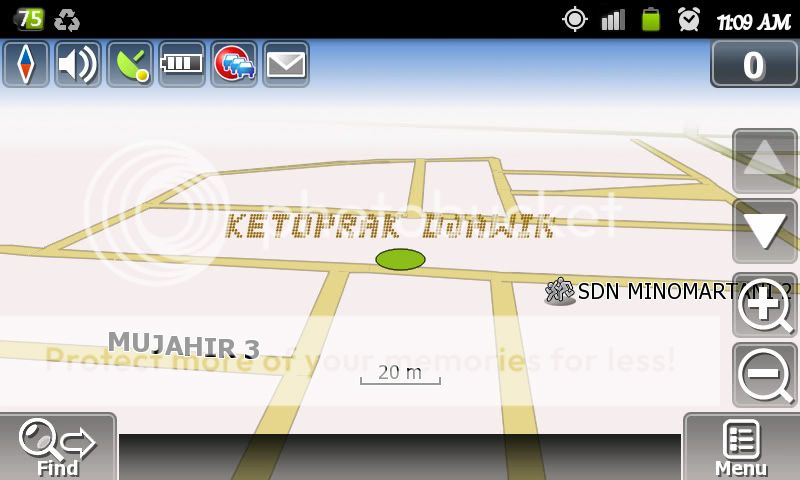
GPS Offline Navitel 5.0.2.721 Plus Navigator berbahasa Indonesia Support ICS


GPS Offline Navitel 5.0.2.721, Navitel Maps v2.26, Navigator berbahasa Indonesia


GPS Navitel Revisi 5 kali ini bisa berjalan Lancar Di Android ICS, namun saya belum mencoba pada JellyBean.
Selain Mudah dalam penggunaannya juga GPS ini tidak membutuhkan pulsa sepersen pun alias OFFLINE.


Download
File apk Navitel 5.0.2.721
http://adf.ly/5bxAN
http://adfoc.us/324001
File maps Navitel Maps v2.26
http://www.mediafire.com/?uac73g49n7wm2u5
Suara Navigator Bahasa Indonesia
http://adf.ly/5bxE2
http://adfoc.us/324004111950

Info :
Untuk yg udah pernah make map versi *.nm3 memang hanya 1 file beda dengan *.nm2 33 file. Disarankan menggunakan map nm2 saja, karena pada map nm3 fitur mencari alamat gak aktif.
Ganti tanda * menjadi . (titik) atau hapus.
Untuk yg mengalami masalah dengan fitur pencarian alamat. Hapus dulu file Index.058.nti di folder maps navitel dan hapus data pada menu Pengaturan>Aplikasi>Atur Aplikasi>Navitel>Hapus Data

Install dan jalankan aplikasi lebih dulu…cara ini akan membuat folder Navitel content di sdcard nya…langkah2 install :

Tutorial :
1. Donlot apk, Navitel, jgn lupa diinstall
2. Donlot map lewat PC,  buka exe nya dengan cara klik 2x tekan next2 aja sampe finish, cari filenya c:mymaps/navigasinavitel. Didalamnya akan ada 33 file berekstensi *.nm2
3. Kopikan folder navitel yg berisi 33 file *.nm2 ke /sdcard/navitelcontent/maps
4. Buka navitel, agak lama, sabar gan tunggu aja, ntar muncul bahasa   rusia, ntar pilih aja english, tekan tanda centang di pojok bawah  kanan,  nah mungkin navitelnya akan close sendiri, buka lagi navitelnya
5. Akan muncul turn on NAVITEL.JAMS ? pilih yes alias tanda centang
6. Muncul tulisan YOUR GPS settings… bla..bla… pilih centang
7. Navitel akan meload peta tunggu hingga 100%
8. selesai gan
9. untuk voice indonesia.  kopikan folder tsb ke /sdcard/navitelcontent/voices

Enjoy it….your Map now in your Hand


Rabu, 20 Februari 2013

ROOT & UNROOT Lenovo A800


Persipapan sebelum Rooting Lenovo A800 Anda
* Bahan2 yang dibutuhkan,
    1. driver MT6577 USB VCOM,
    2. Root_with_Restore_by_Bin4ry_v15,
    3. Busybox.apk
* Downloadd Bahan2nya Dimari
* Setting HH A800 anda pastikan USB debugging pada menu Developers option ter-centang

Langkah Rooting
1. Hubungkan HH A800 anda ke PC, Lalu di HH anda akan tampil menu USB computer connection,
    Lalu Biarkan saja jangan Klik apapun, Pastikan USB Debugging Tercentang.
2. Install Driver MT6577 USB VCOM
3. Jalankan Runme.bat dalam folder Root_with_Restore_by_Bin4ry_v15
4. Pilih 1.Normal
5. ketik y lalu enter
6. ikuti langkah2nya & baca dengan baik
7. lalu HH anda Restart sendiri,
8. Jika root berhasil maka pada HH anda Akan Terinstal Aplikasi SuperSU (Bergambar Android Seperti Superman)
9. setelah itu install aplikasi Busybox.apk pada HH anda, lalu pilih install, jika busybox berhasil terinstall maka ada informasi Status: Done!
10. Restart HH anda

Untuk UNROOT
1. Jalankan Runme.bat dalam folder Root_with_Restore_by_Bin4ry_v15
2. Pilih X.Unroot

Silahkan mencoba, dan semoga berhasil
By -Yudha- ADMAJA (Android majapahit)

Kamis, 07 Februari 2013

Cara Mudah Root & UNROOT Smartfren Andromax-i / Hisense AD683G


Berhubung masih ada saja yang bingung dengan Cara Rooting Android Smartfren Andromax-i / Hisense AD683G. Ane akan jelasin langkah-langkahnya selengkap-lengkapnya serta sejelas-jelasnya. Biar kebanyang nanti prosesnya, ane sertakan gambarnya.

Langsung saja mulai proses rooting-nya. DWYOR (Do With Your Own Risk) :D

Langkah 1
Download bahan-bahan


Langkah 2
Biar gak ribet pake card reader, install dahulu Windows Driver nya. Tinggal klik setup.exe nya :)

Setelah selesai install driver windowsnya, simpan file CWM-6.0.2.3.zip dan CWM-SuperSU-v0.99.zipke dalam microSD. 

Caranya: Sambungkan HH dengan kabel data ke komputer/laptop, pilih mode media penyimpanan. Terus tinggal copas file CWM-6.0.2.3.zip dan CWM-SuperSU-v0.99.zip ke microSD.


Ingat, nanti bakal ada dua drive yang ke detek, yaitu drive (G:) memori internal dan drive (I:) microSD. Jadi, jangan salah nyimpennya yah. Setelah di copy ke microSD, pilih mode hanya mengisi, baru cabut kabel datanya. Matikan HH-nya.

Langkah 3
Setelah HH mati, pencet secara bersamaan tombol power + tombol volume bawah. Biar gak salah, teken tombol volume bawah dulu, baru deh pencet tombol power-nya sampai HH nyala. Setelah nyala, maka akan muncul gambar android sedang dibongkar.


Pencet tombol home, maka muncul Adroid System Recovery


Arahkan dengan menggunakan tombol volume, ke menu apply update from external storage, kemudian pencet tombol menu (sebelah kiri tombol home) untuk memilih, maka muncul penampakkan seperti ini:


Terlihat sudah ada dua file tadi yang telah disimpan ke microSD. Arahkan ke file CWM-6.0.2.3.zipdengan tombol volume, kemudian pilih ok dengan menekan tombol menu (sebelah kiri tombol home).

Tanda sudah selesai install CWM :)


Reboot HH-nya, kemudian matikan lagi HH-nya.

Langkah 4
Setelah HH mati, pencet secara bersamaan tombol power + tombol volume bawah. Biar gak salah, teken tombol volume bawah dulu, baru deh pencet tombol power-nya sampai HH nyala. Nanti muncul penampakkan CWM yang telah di install tadi.
Navigasi
- Pilih/OK : pencet tombol search/ gambar lup
- Mengarahkan pilihan : pencet tombol volume atas/bawah
- Kembali/Back : pencet tombol kembali/back

Pilih install zip from sdcard


Pilih choose zip from sdcard


Arahkan ke file CWM-SuperSU-v0.99.zip, pencet OK


Arahkan ke Yes - Install CWM-SuperSU-v0.99.zip, pencet OK


Ciri CWM-SuperSU-v0.99 sudah terinstall


Tekan tombol back beberapa kali sampai ke menu utama, pilih reboot, pencet OK.

Langkah 5
Setelah masuk home screen, buka app draw, lihat apakah sudah ada aplikasi Super User atau belum. Jika ada aplikasi Super User, itu tandanya proses rooting sukses.


Selamat, HH kamu berhasil di-root :)


UnRoot Smartfren Andromax-i / Hisense AD683G

Setelah kemarin ane kasih tau Cara Mudah Nge-Root Smartfren Andromax-i / Hisense AD683G, nah sekarang bagaimana cara ngilangin root-nya. Unroot ini berguna untuk klaim garansi ke pihak smartfren. Soalnya kalo HH-nya masih root, kita gak bisa klaim garansi atau garansi dianggap hangus :D

Langkah 1
Buka aplikasi Super SU (yang kayak ikon android superman).

Langkah 2
Pilih tab Pengaturan, terus pilih Unroot Penuh


Kalo ada peringatan seperti ini, pilih Lanjutkan saja.


Secara otomatis aplikasi Super SU udah gak ada di app draw.

Langkah 3
Reboot atau Nyalakan Ulang HH nya, selesai :)

Selasa, 05 Februari 2013

make 3g USB modem work on Android

++++++++++++
The Liberty Tab journey -reports from my process towards making a 10.1 inch tablet computer become my primary computer.
The product i use for this is a Packard Bell Liberty Tab G100. Please note that:
Packard Bell Liberty Tab G100
and
Acer Iconia A500 TAB
are identical products and that i will use the two product names synonymous.
++++++++++++
To make 3g USB modem (mobile broardband) work
Packard Bell Liberty Tab G100 comes with build in WI-FI but not with built in 3g modem (SIM Card) function. I wanted to use my 3g USB dongle modem (mobile broadband) to go on the internet. My 3G modem is a Huawei E1750.
The mobile broadband solution I have used for some years now in Linux as my everyday internet connection. I have several time spent some time to get it to the work under various Linuxes. Huawei E1750 and indeed all the various Huawei 3G modem are made in such a manner that they themselves have the drivers for eg Windows on board. The way it works is that when you first put the modem in the Windows computer the modem reports to the system as a CD-ROM containing the installation program. After installation is complete the installed software sends a signal to the modem that it must now change from being a CD-ROM to be a Modem. It is this shift operation which is causing some problems under Linux, and therefore also under Android (Android is Linux based). A German guy named Draisberghof has developed a Linux tool for this switching operation. This tool is called USB_modeswitch. All Android tablet computer that I know of are driven by a process type called ARM. Draisberghof have compiles a version of usb_modeswitch for the ARM processor.
. And he has compiled it STATIC. That is, he has compiled a version of usb_modeswitch that can run without any further dependencies on most android devices, smart phones, tablets, etc. Will need this version of usb_modeswitch for making the 3g modem work on our Android tablet. It can be downloaded from here.
http://www.draisberghof.de/usb_modeswitch/#download
Look for the text
"Upon a recent request I Provide a static binary for ARM: usb_modeswitch-1.1.9-arm static.bz2."
Under the Download headings on the page and download it.
I'll have to say now that before you can even do the following, you must first have installed a costume ROM on your device. The stuck ROM (also called firmwire) that ships with the Packard Bell Liberty Tab G100 does not support 3G USB modem. It does in fact not support USB devices at all. I will talk about the process of installing costume ROM in another post. For this post we'll assume you have already installed a costume ROM that supports 3G modem and that your tablet is rooted witch it will propel be if you have installed a costume ROM.
You need an android terminal for the next step. I have been very happy about a terminal called ConnectBot It's free (Android marked). But otherwise you can just use Terminal Emulator also from Android marked.
OK let's say you have downloaded usb_modeswitch-1.1.9-arm-static.bz2 to your PC. A easy way to get it on your tablet could be pulling the mini-sd-card out of the tablet. Putting it in a card reader on your PC. Add usb_modeswitch-1.1.9-arm-static.bz2 onto the card and put the card back into the tablet computer. So you need a good file manager. Astro (app) is good. (Total commandor app is even better). With your file manager find usb_modeswitch-1.1.9-arm-static.bz2 on external_sd. If you click and hold usb_modeswitch-1.1.9-arm.static.bz2 in Astro you can unpacks the bz2 archives and so you'll get the pure binary file usb_modeswitch-1.1.9-arm-static. usb_modeswitch-1.1.9-arm-static should now be maneuvered into a specific directory on your tablet PC for
/data/local
You can do this by opening your terminal
and then:
su
to become root
cd /data/local
and
cp /mnt/external_sd/usb_modeswitch-1.1.9-arm-static .
now you just make sure that usb_modeswitch-1.1.9-arm-static is executable
chmod 0755 usb_modeswitch-1.1.9-arm-static
Now you're actually ready to initiate your modem by giving a very long command to usb_modeswitch-1.1.9-arm-static. This command is so vast that it must be in a script if you want to use it many times and you must if you use this method.
You must therefore have made a small shell script which shall also be
/data/local/
The shell it self is nothing but a plain text file with a few lines of text in. The text lines are here.
--------------------------------------
#!/bin/sh
/data/local/usb_modeswitch-1.1.9-arm-static -v 0x12d1 -p 0x1446 -V 0x12d1 -P 0x1001 -s 20 -M "5553
4243000000000000000000000011060000000000000000000000000000"
--------------------------------------
How you'll make this small text file and gets it into
/data/local
I will leave it up to you for now. But when you have done it you must also make sure that it is executable
chmod 0755 mymodeswitch # or whatever name you gave your little script
You can now put your modem into the USB port on your tablet computer and then run your script
by typing
/data/local/mymodeswitch
in your terminal.
You can see what usb_modeswitch-1.1.9-arm-static "answer". If it finds a modem and it succeed with the switch operation it will answer that it succeeded.
If you have another Huawei modem than E1750 it may be you need another mode line. The mode line is the long number line that you can see the script text above.
Try to search google with your Huawei your-model usb_modeswitch
I had to even adjust some of the values to get to the values that i use here. Her the tool:
lsusb
Is a good help. Just tupe "lsusb" in the terminal and see what it says.
If you manage to switch your modem, you must have it set up in your Android system settings
as well.
Go to settings turn of WI-FI. Find the settings for mobile broadband. Enter or choose two pieces of information. Your access point and your network. It is in my case:
network: Telia
accespoint: websp
After that it worked for me.
Every time I turn on the tablet computer and wants to use internet will I open a terminal and execute my modem initiation script
su
/data/local/mymodeswitch
So it takes a few minutes when the modem initialize and connect and after this I'm ready to go on facebook and email and surf the Internet.